In this blog post, we will create a Color Detector that will detect color names and RGB values from any picture using Python and OpenCV. The application will gives us the name of the color when we click on any area in the picture.
We have a data file that contains color names and its RGB values. We will calculate the distance from each color and find the shortest one.
Colors are made up of 3 primary colors: red, green and blue. Computers define each color value within a range of 0 to 255. We will be using a dataset (download here) that contains 865 RGB values with their corresponding names.
# import libraries
import cv2
import numpy as np
import pandas as pd
import argparse
We will give the option to choose an image from our computer. For that, we will create an argument parser using the argparse library. We can directly give an image from the command prompt.
# create argument parser to take image path from command line
ap = argparse.ArgumentParser()
ap.add_argument('-i', '--image', required=True, help='Image Path')
args = vars(ap.parse_args())
img_path = args['image']

# read the image with opencv
img = cv2.imread(img_path)
We’ll read the CSV file and load it into the pandas dataframe. We’ll assign each column with a name for better comprehension.
# name each column
index = ['color', 'color_name', 'hex', 'R', 'G', 'B']

# read csv file with pandas
csv = pd.read_csv('colors.csv', names=index, header=None)
We’ll create a window in which the input image will display, and set a callback function which will be called when a mouse event happens.
# create window to display input image
cv2.namedWindow('image')

# set callback function for mouse event
cv2.setMouseCallback('image', draw_function)
We’ll create a function will will calculate the RGB values of the pixel where we double-click on the image. The function parameters have the event name, (x, y) co-ordinates of the mouse position, etc. In the function, we check if the event is double-clicked, and then we calculate and set the r,g,b values along with the x,y positions of the mouse.
def draw_function(event, x, y, flags, param):
    if event == cv2.EVENT_LBUTTONDBLCLICK:
        global b, g, r, xpos, ypos, clicked
        clicked = True
        xpos = x
        ypos = y
        b, g, r = img[y, x]
        b = int(b)
        g = int(g)
        r = int(r)
We’ll need another function which will return the color name from RGB values. To get the color name, we calculate a distance d, which tells us how close we are to the color and choose the one having the minimum distance.
def getColorName(R,G,B):
minimum = 10000
for i in range(len(csv)):
d = abs(R- int(csv.loc[i,"R"])) + abs(G- int(csv.loc[i,"G"]))+ abs(B- int(csv.loc[i,"B"]))
if(d<=minimum):
minimum = d
cname = csv.loc[i,"color_name"]
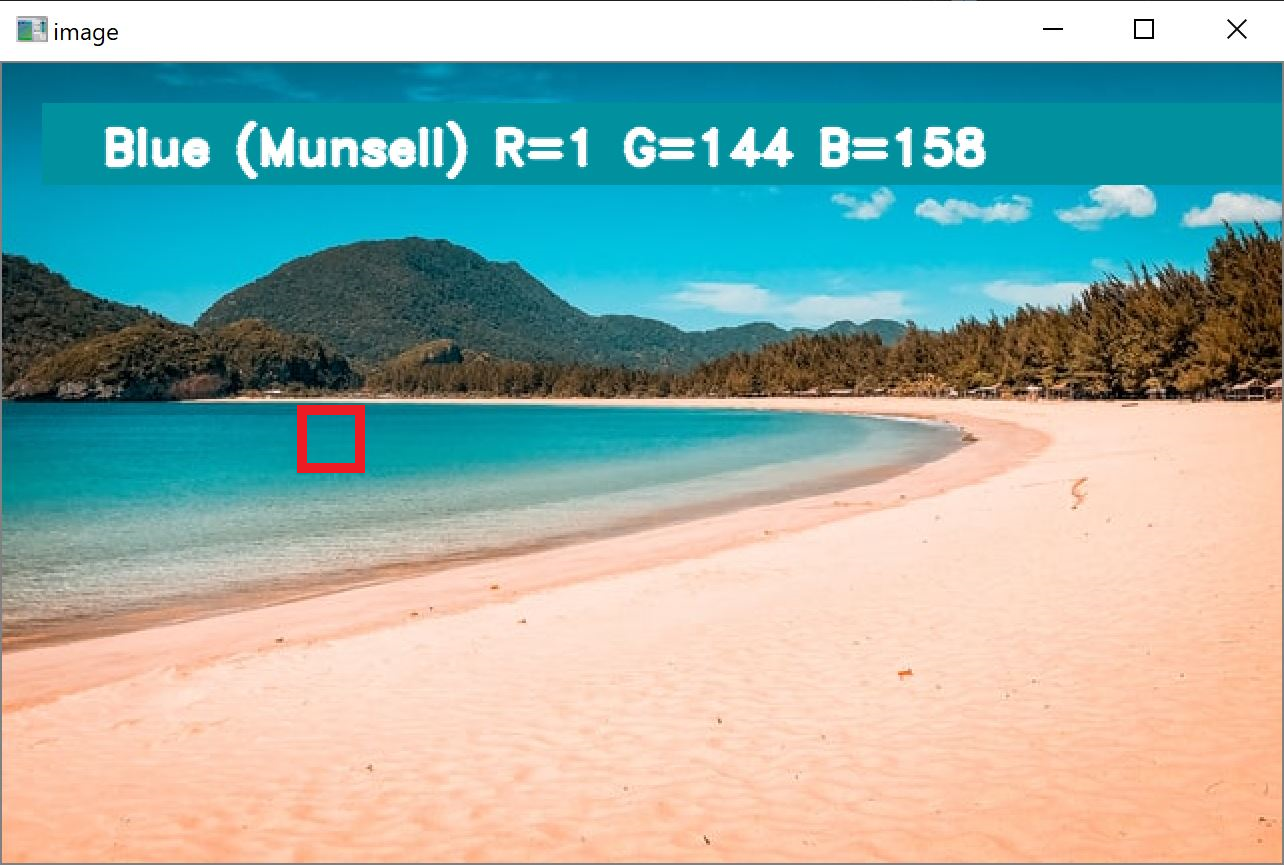
return cnameWhenever we double-click on a pixel on the image, the corresponding color name and RGB values will appear on the top of the window.
Using the cv2.imshow() function, we draw the image on the window. When the user double clicks the window, we draw a rectangle using cv2.rectangle and get the color name to draw text on the window using cv2.putText().
while(1):
cv2.imshow("image",img)
if (clicked):
#cv2.rectangle(image, startpoint, endpoint, color, thickness)-1 fills entire rectangle
cv2.rectangle(img,(20,20), (750,60), (b,g,r), -1)
#Creating text string to display( Color name and RGB values )
text = getColorName(r,g,b) + ' R='+ str(r) + ' G='+ str(g) + ' B='+ str(b)
#cv2.putText(img,text,start,font(0-7),fontScale,color,thickness,lineType )
cv2.putText(img, text,(50,50),2,0.8,(255,255,255),2,cv2.LINE_AA)
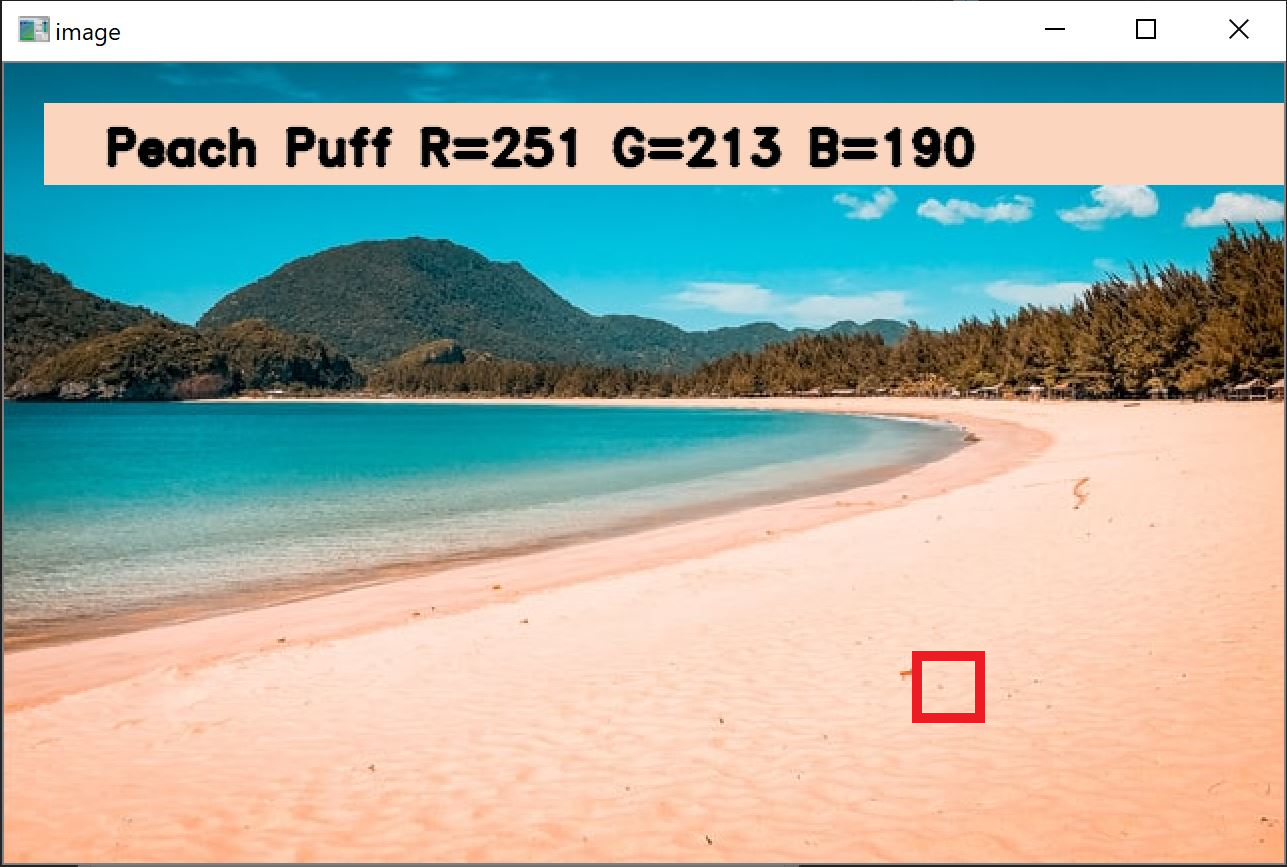
#For very light colours we will display text in black colour
if(r+g+b>=600):
cv2.putText(img, text,(50,50),2,0.8,(0,0,0),2,cv2.LINE_AA)
clicked=False
#Break the loop when user hits 'esc' key
if cv2.waitKey(20) & 0xFF ==27:
break
cv2.destroyAllWindows()The application is now built. We can run the Python file from the command prompt using the following code. If the image is in the same directory, use the image name. If the image is in a different directory, make sure you give the full path of the image.
- List item
- List item
python color_detection.py <image name/path here>